How to Drill into a Wall Stud (And Exactly What to Do If You Miss)
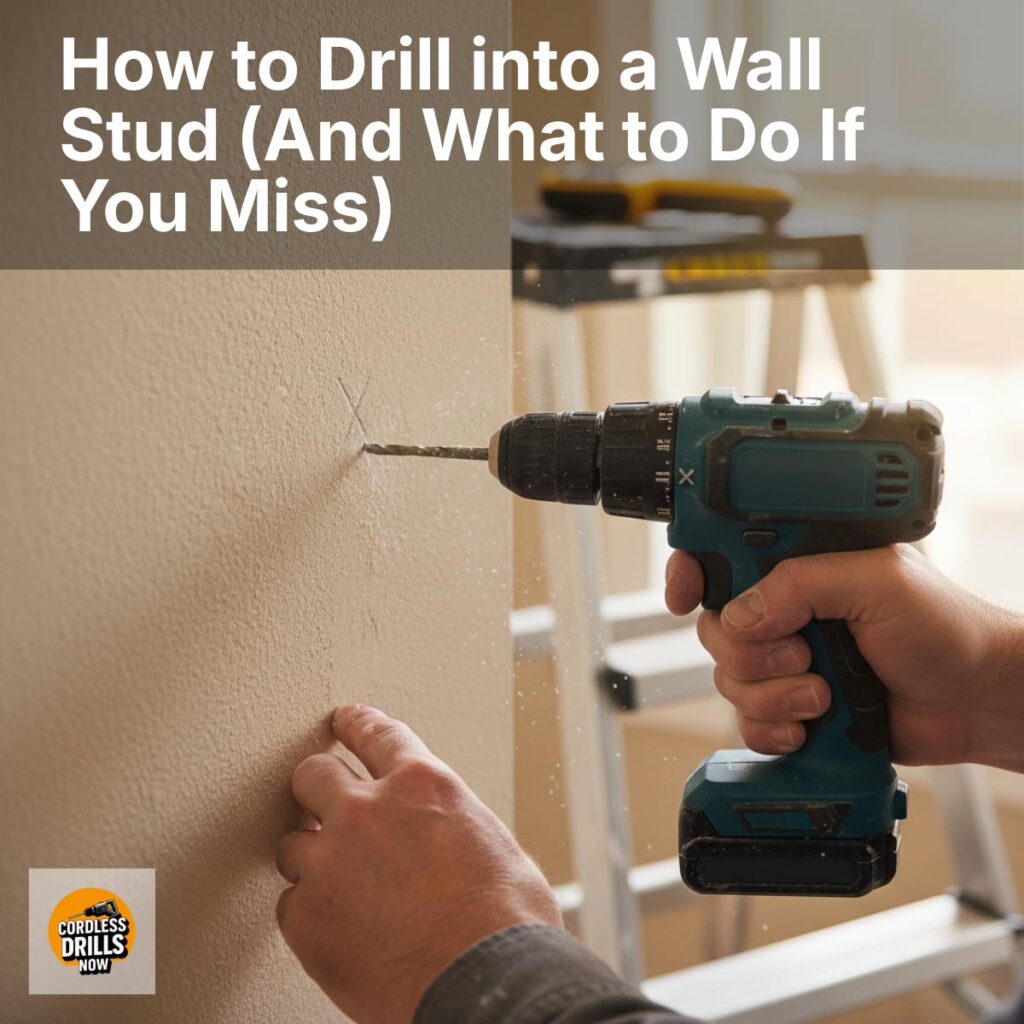
<p>Drilling into a wall stud is a fundamental skill for secure installations, from shelving to mounting heavy electronics. When you align your drill with a stud, you gain the strength and support that drywall alone cannot provide. This guide outlines a clear, methodical approach to locating a stud, drilling accurately, and what steps to take if you miss the mark.</p><p>Preparation and planning<br>- Gather the right tools: a stud finder, pencil, tape measure, small level, drill with appropriate wood bits, a masonry bit if you are drilling into brick or concrete, a stud-spotter or magnetic stud finder as a backup, and a vacuum or brush to keep the area clean.<br>- Check for utilities: before drilling, ensure there are no electrical cables or plumbing lines in the intended path. Use a stud finder with live-wire detection or consult building plans if available.<br>- Choose your drill bit: for wood studs, use a sharp wood drill bit. If you are mounting into a metal stud, select a high-speed steel bit suitable for metal.</p><p>Locating the stud<br>1) Use a stud finder to identify probable stud locations along the wall. Studs are typically spaced 16 inches on center in many residences, but older homes may vary (12 or 24 inches). Mark the edges of the stud with a light pencil line.<br>2) Validate with a secondary method: once you detect a edge, measure horizontally from an adjacent known feature (outlet boxes, corner beads) or use a magnet to locate the screws or nails that hold the drywall to the stud. The center of the stud will be slightly offset from the edge marks.<br>3) Confirm thickness and orientation: feel for a solid, rigid section behind the drywall. Tap lightly; a hollow sound indicates you may be in the drywall cavity rather than a stud. Recheck your measurements and marks before drilling.</p><p>Drilling into the stud<br>- Drill bit choice: for wood, a sharp bit that matches the screw size you plan to use. Pre-drill a smaller pilot hole to reduce splitting, especially near edges.<br>- Drill straight and steady: hold the drill perpendicular to the wall with a firm, controlled pressure. Start slow to ensure the bit bites cleanly, then increase speed gradually.<br>- Depth control: if you know the exact depth you need, consider using a stopper on the drill bit or measuring the required depth and backing out as needed to avoid drilling through the far side of the stud or into plumbing/canals behind the wall.<br>- Clean as you go: periodically remove dust with a brush or vacuum to maintain visibility and prevent slippage when you resume drilling.</p><p>What to do if you miss<br>Misjudging a stud location happens. Here’s how to recover without damage:<br>- Stop and assess: pull back the drill if you notice the bit exiting the drywall into empty space or if you sense the bit is no longer in a dense material.<br>- Do not panic: locate the nearest edge of the original stud line, then re-check the marks. If you drilled near the edge, you may have hit the edge of the stud; a second hole a few inches away in a safe area is often sufficient.<br>- Patch and realign: if you hit hollow drywall without contacting wood, you’ll need to patch. Remove any debris, apply a wall patch compound, and sand smooth once dry. Re-mark the stud line more carefully.<br>- Use a broader approach: if you are mounting a heavy item and repeatedly miss, consider using a wall anchor system designed for drywall-only mounting or switch to a more secure fastening method like toggles or molly bolts, depending on the load and wall type. For heavy loads, you may need to locate two studs for better weight distribution.<br>- Re-check for safety: especially near electrical boxes or plumbing, verify that your new hole will not interfere with hidden utilities. If needed, pause and consult a professional to avoid costly or dangerous consequences.</p><p>Tips for reliable results<br>- Verify before you drill: always confirm stud location with at least two methods to minimize false positives.<br>- Keep bits sharp: dull bits require more force and can wander, increasing the risk of missing the stud or splitting the wood.<br>- Consider the load: lighter items can rely on drywall anchors, but heavier items demand secure attachment to studs for safety.<br>- Practice on a scrap piece: if you are new to drilling or using a new bit, practice on a scrap piece of wood or an inconspicuous area to build confidence.<br>- Maintain clarity of marks: use a level to ensure your mounting point is plumb, which reduces the chance of skewed holes and misalignment over time.</p><p>Conclusion<br>Hitting a wall stud with precision combines careful scouting, methodical drilling, and contingency planning for missteps. By following a structured approach, you can achieve dependable, professional results that stand up to use and time, while preserving the integrity of your wall and its contents. If uncertainty arises at any point—especially in high-stakes installations—don’t hesitate to seek expert guidance to ensure safety and success.</p><p><a href="https://www.cordlessdrillsnow.com/how-to-drill-into-a-wall-stud-and-exactly-what-to-do-if-you-miss/">Source</a></p>


Comments
Post a Comment